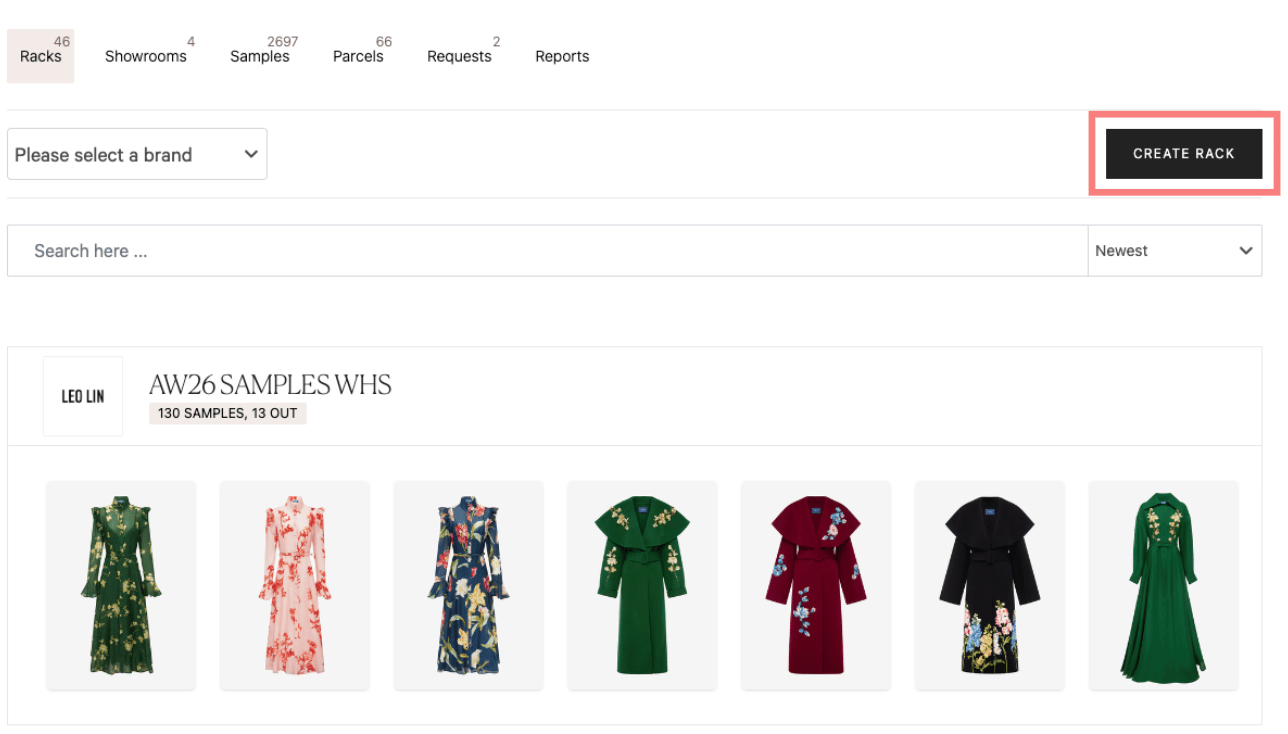
- Navigate to the ‘Racks’ tab within ‘Sample Tracking’, and click 'Create Rack' on the right of your screen.
- Select a brand and give the rack a name that represents the collection (e.g. SS20 or Collection Name - Accessories.
- Fill in the rack details: season, size, stockist (s), and in-store date, then click 'Save'.
- From here, you can add samples to your rack*—either select images from your Press Centre albums or upload new images from your computer (see full details below).
*We recommend using look book or high-quality product images. If these aren’t available, iPhone photos are also fine.
Create samples from images in an existing Flaunter album:
- Select ‘Add samples using album’
- Choose an album from the dropdown to display available images
- Select images by clicking individually or click ‘Select all’
- Edit the sample name, add an RRP, and increase the quantity if you have more than one of the same item [see next page for more details].
- Select ‘Submit’.

Create samples from new images:
- Choose images from Dropbox or upload images directly from your computer.
- Click the dotted box to choose files or drag and drop multiple files into the dotted box.
- The images will upload and convert to samples [to create multiple samples from one image see page 3].
- Select ‘Save’.
How to create multiple samples from one image [existing Flaunter album]:
If you are using images from an existing album, you can use one image to create multiple samples.
To do this, increase the quantity in the ‘Qty’ box that appears under each sample name before clicking ‘Submit’.
The name field that appears when you first click an image is for renaming the image itself (e.g. change IMG_456373 to Ruffle Top).
Here are some common examples of creating multiple samples from the one image: Lookbook image containing a top & bottom:
- Select the image and set the quantity to 2.
- After clicking ‘Submit’, there will be 2 copies of the lookbook image.
- Rename each image with the relevant product title (e.g. Puff Sleeve Top and Wide Leg Bottoms).
Duplicates of a single item:
- If you have multiple duplicates of the same item, create multiple samples from one image by setting the quantity to match your number of samples and clicking ‘Submit’.
- Rename each image with a unique identifier (e.g. Ruffle Spot Top 1, Ruffle Spot Top 2), or by size if applicable (e.g. Ruffle Top – Size 8, Ruffle Top – Size 10).

How to create multiple samples from one image [uploading from your Desktop]:
To create multiple samples from one image when uploading new images (these are images that have not already uploaded to a Flaunter album) you will need to duplicate images on your desktop before uploading to Flaunter.
- Duplicate images on your desktop (or in dropbox).
- Rename each image according to the sample they will represent in your showroom [refer to page 2 examples].
- Upload all images to your Flaunter rack.
You can also manually duplicate samples in an existing rack:
- Open a rack.
- Hover over an image card and click the three white dots [...] that appear in the top right of the image card.
- Click ‘Duplicate’. A new sample will appear at the top of your rack. Rename as appropriate.

Hot tip: If you are uploading more 50+ images at a time, it may take some time to upload [depending on your wifi] - in this case, leave the browser running in the background [whilst you continue on other things] you will receive an in-app alert when the images have finished uploading.
How to add product details and tags to samples:
Adding product details and tags to samples will help you find and identify samples later when using the ‘Sample Search’ feature (see page 9). We recommend adding keyword tags, such as product category, colours, make or fabric. There are two ways to add product details to your samples:
Option 1 - Edit all samples in the rack via CSV.
- Navigate to a rack and click ‘Download CSV’.
- Input rrp, sku, stockists and tags (do not edit the ID column) > save.
- Click ‘Upload CSV’ > select your edited CSV to apply updates.
 Option 2 - Edit individual sample details
- Hover over an image card and click the three dots [...] that appear in the top right of the image card.
- Click ‘Edit’.
- A pop up window will appear allowing you to edit details, replace the sample image (eg. replace an temporary iPhone shot with a lookbook shot) and input tags.
- Click ‘Save’.
